Puzzle magnets · 12 min
Set up and sell puzzle magnets.
Set it up once. Customers pick a grid, crop their photo, and pay — all on their phone. The print queue keeps the pieces together on the sheet. You don't lay anything out, and you don't fiddle with each order.
1. Add the product
One product, every grid you want to sell.
Products → New → Puzzle Magnets. Pick the magnet size, switch on the grids you want, set a price for each. Teal numbers below match the badges on the screenshot.
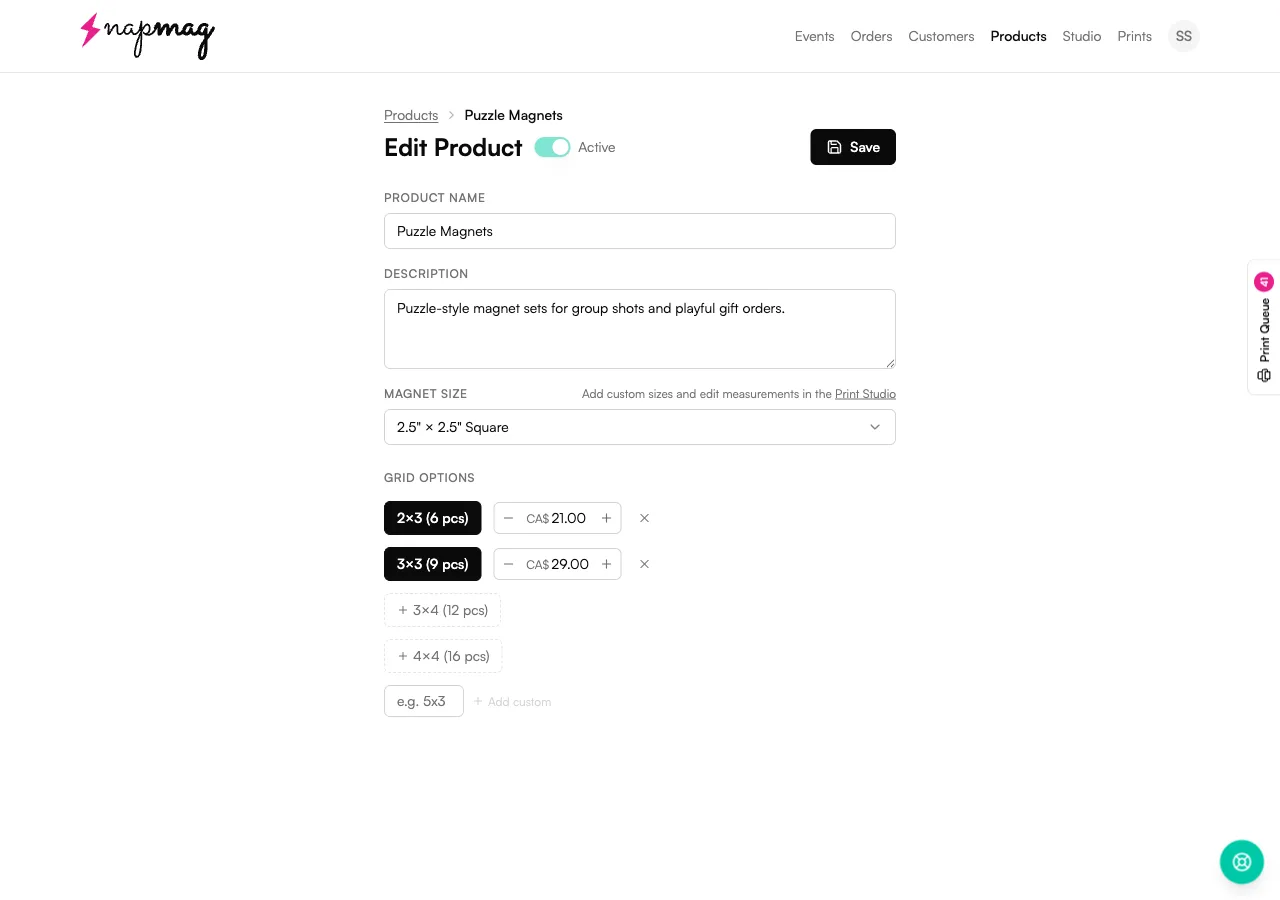 1234
1234Magnet size
- Set it to
- Pick the square size you stock — 2"×2", 2.5"×2.5", and so on.
- Worth knowing
- Puzzle pieces are squares only (no circles). Edit Measurements saves separately for each magnet size. Your puzzle uses the same one as your regular squares.
Grid presets
- Set it to
- Click any greyed-out preset (2×3, 3×3, 3×4, 4×4) to switch it on. Click ✕ to take it off.
- Worth knowing
- Every grid you switch on shows up as its own option at checkout. And you don't need to add the flipped version — switch on 2×3 and the customer also gets 3×2 for landscape photos. One toggle, both shapes.
Per-grid price
- Set it to
- Set the price per grid in dollars — this is the price for the whole puzzle, not per piece.
- Worth knowing
- A 3×3 priced at CA$29 sells as one 9-piece order at $29. Bigger grids should price for the photo, not the count.
Add custom grid
- Set it to
- Type any NxM (e.g. 5x3, 2x4, 3x5) and hit Add custom.
- Worth knowing
- You're not stuck with the four presets. Custom grids show up at checkout the same way, with their own price. The flipped version comes free too — add 5×3 and your customer also gets 3×5.
2. Turn it on for an event
Tick the box. Change prices if you want.
When you create a new event (or open Settings on one you've already made), each product has a checkbox and a Packs row you can open to change prices for just this event.
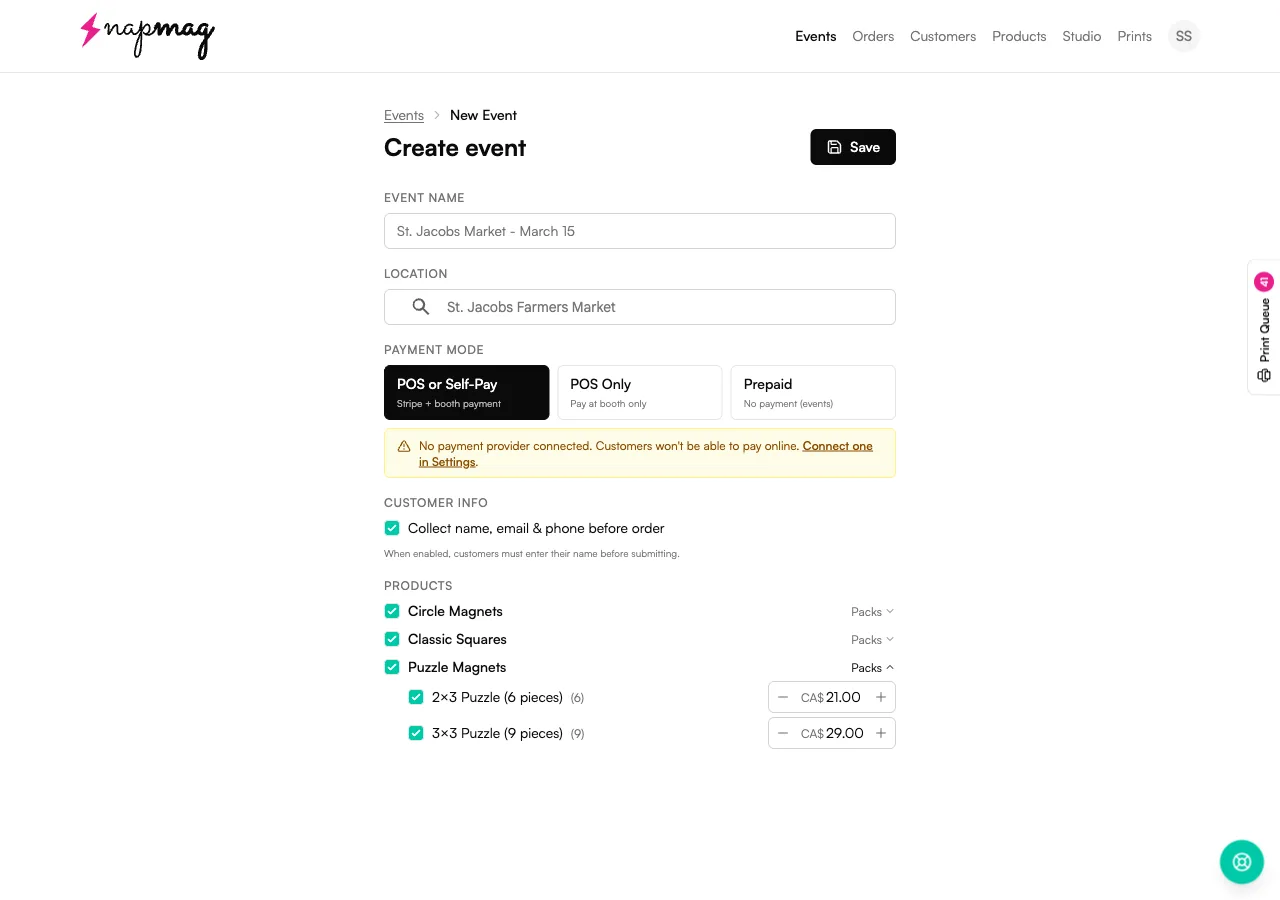
Sell only 2×3s at a quick market, charge more for the 4×4 at a wedding fair, or leave everything as-is. Either way, your saved product doesn't change.
3. What the customer sees
Pick a grid, crop, pay.
On the customer's phone, the grid they pick decides everything else — the shape they crop to, the live preview, and the price.
Switching grids reshapes the crop
2×3, 3×2, 3×3. The crop frame snaps to each grid's shape, and the seam lines update right away.
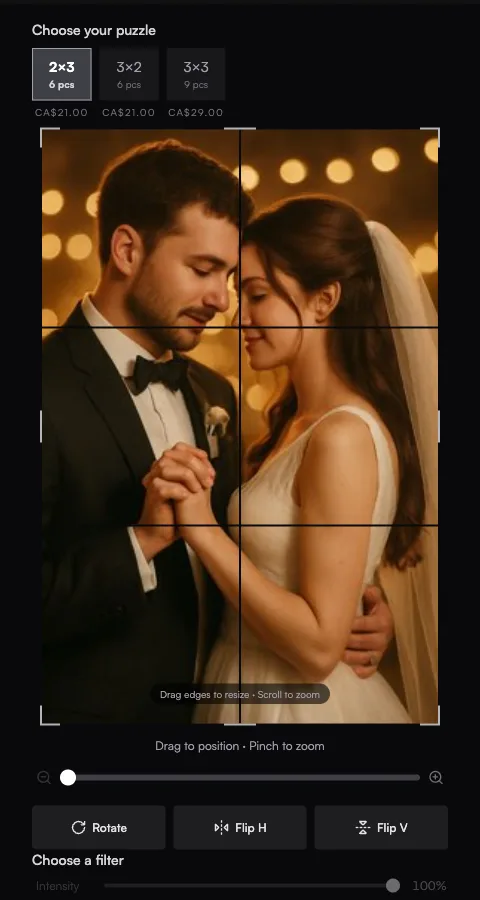
Same buttons as a regular magnet
Rotate, flip, zoom, and filters all work the same way. Customers don't have to learn anything new.
- The grid sets the shape. Pick 3×4 and the crop frame locks to that shape — they can't send through a wrong-shape photo.
- Live preview of the seams. The grid lines on their crop sit exactly where the magnets meet on your sheet.
- Nothing new to learn. Same buttons as your other products — you don't have to teach customers anything new at the booth.
4. Print day
Pieces stay together in the queue.
In your event's order table, a puzzle order looks like any other — queue number, status, total. Open it and you'll see every piece. In the print queue they're kept on the same sheet when there's room.
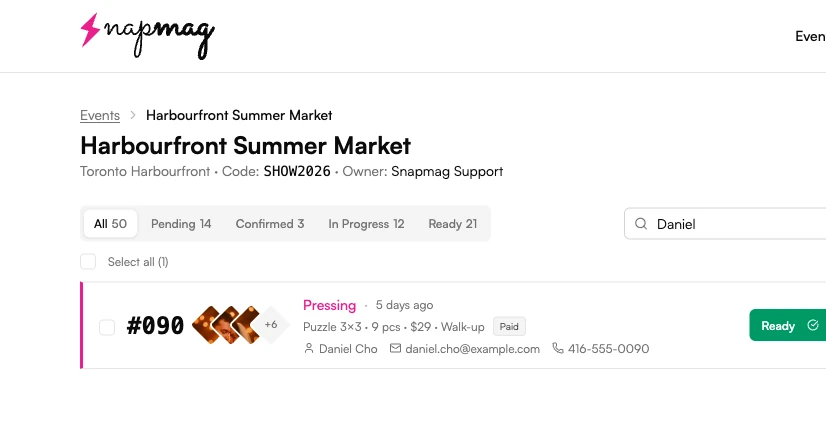
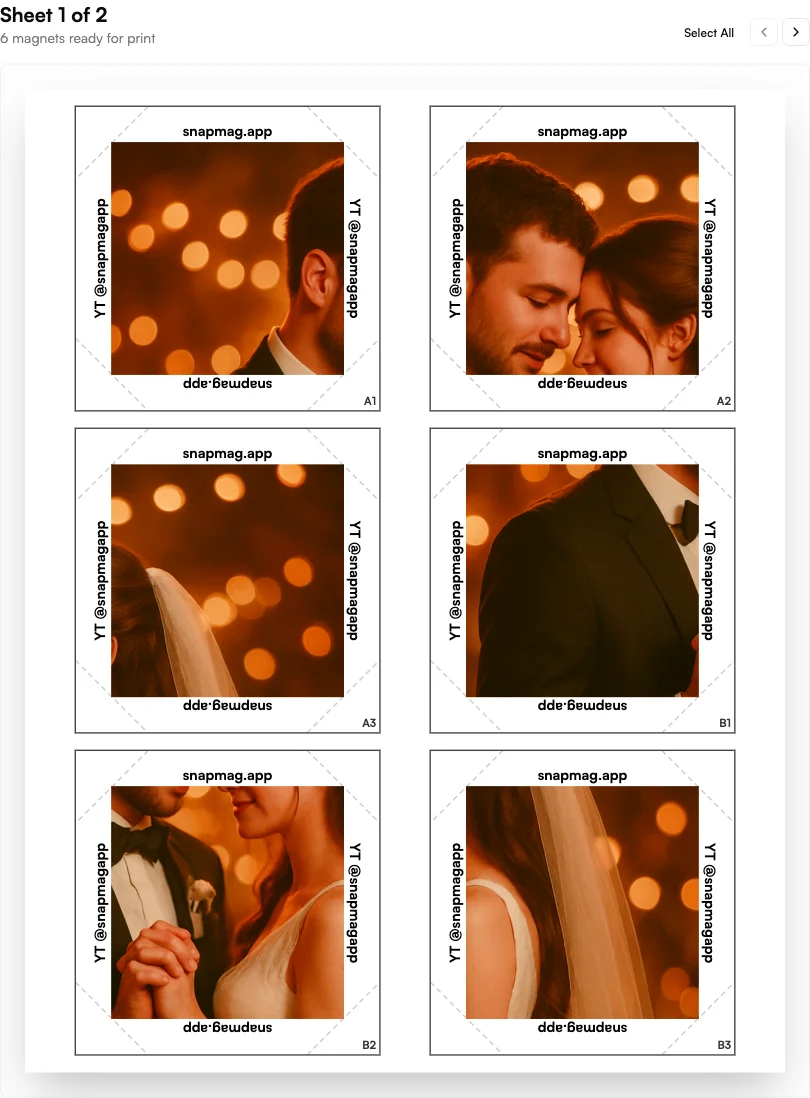
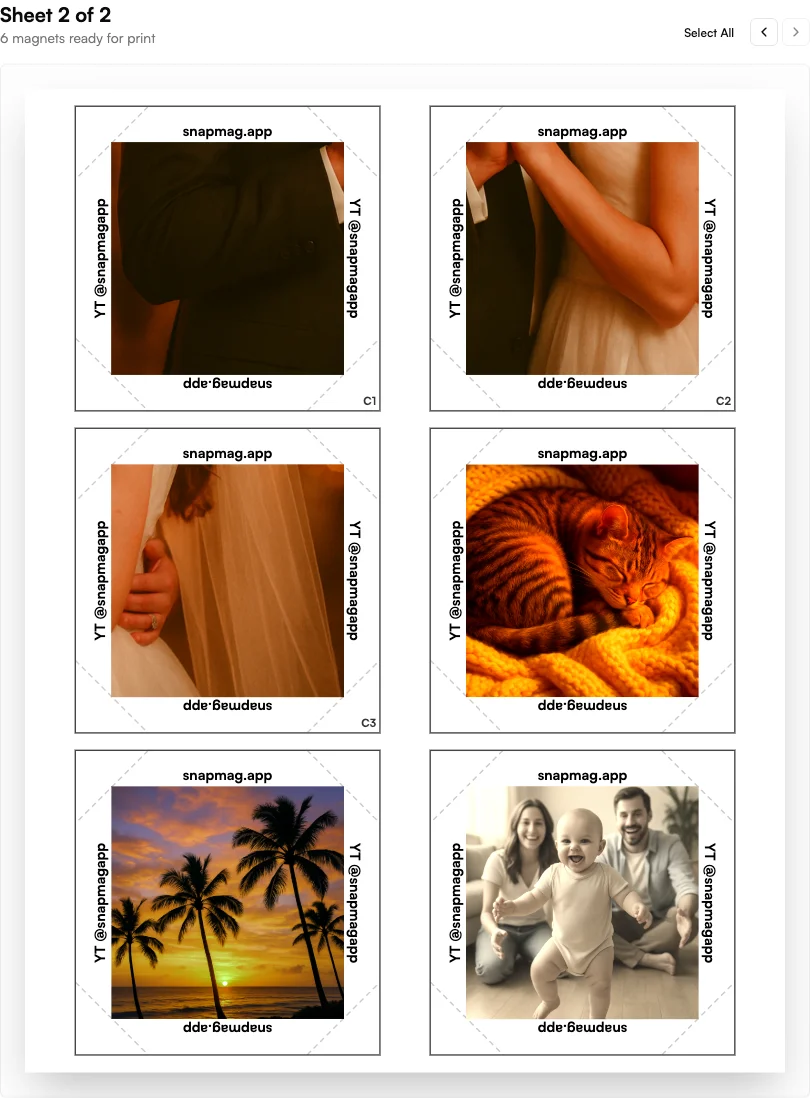
- Every piece is tracked on its own. Each tile carries a row and column label, but the order, status, and pickup stay with the whole puzzle.
- Same Edit Measurements as squares. Photo Size, Edge Width, Cut Offset all carry over. The only puzzle-specific setting is Puzzle Bleed — the gap between the pieces once they're put together.
- Mixed sheets are fine. The queue mixes magnets from different orders to fill each sheet, and it keeps a single puzzle's pieces together when there's room.
First-puzzle checklist
Run a 2×3 test sheet before your first event. If your squares are already dialled in, the only setting you usually need to nudge is Puzzle Bleed — see the size measurements guide.
Frequently asked
Puzzle questions vendors actually send us.
Can I offer custom grids beyond 2×3 / 3×3 / 3×4 / 4×4?+
Can pieces from different orders share a sheet?+
How is pricing handled — per piece or per puzzle?+
Can I switch a customer to a different grid mid-order?+
Keep going
Related reads.
Getting started with Vixie
Account, payments, products, branding, and your first event in about 30 minutes.
Read more →Event-day · 7 stepsRunning a Vixie event
From Start event to last pickup — the order pipeline, batch printing, and walk-ups.
Read more →Size measurements · 10 minMagnet size measurements
Annotated walkthrough of every Edit Measurements field, plus a diagnostic table for the test sheet.
Read more →Ready to add puzzle magnets to your booth?
Add the product, tick it on for your next event, and let your customers do the layout work for you.
Start Free 7-Day TrialNo credit card required. Cancel anytime.